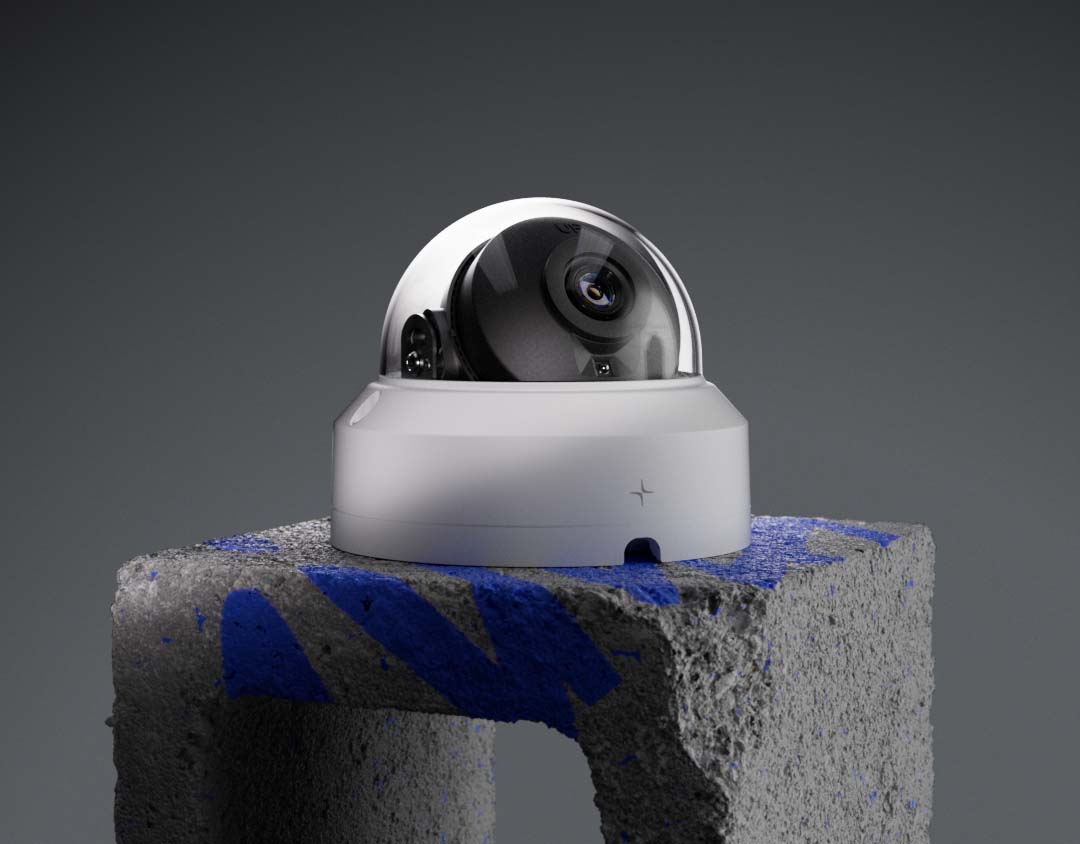
Managing light reflections in 3D rendering can be challenging, particularly when working with glass materials. At times, you might need to eliminate specific light reflections on objects. While the Light Pass mask is a common tool to turn off reflections, it often falls short, especially when light sources are in close proximity to the object, still appearing in reflections. In this guide, we'll walk you through a systematic approach to completely remove any unwanted light reflections in your Glass material, exemplified by our recent Lumana render.
Understanding the Challenge:
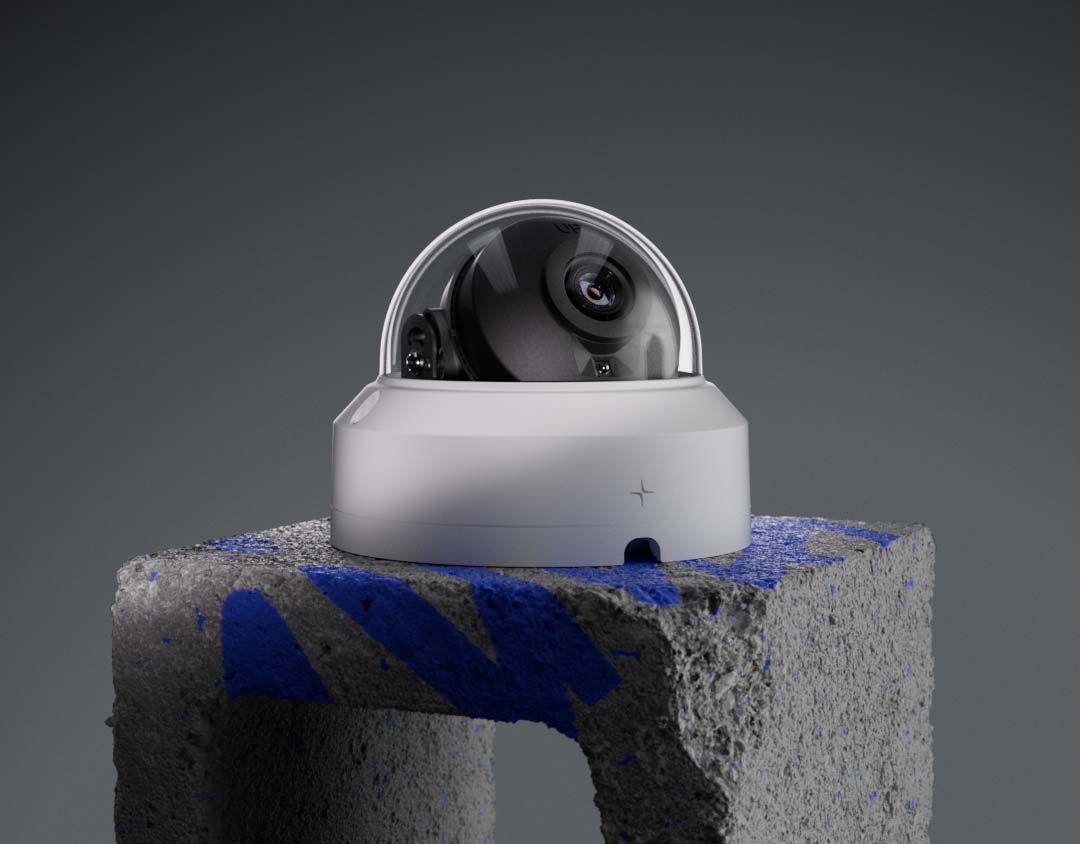
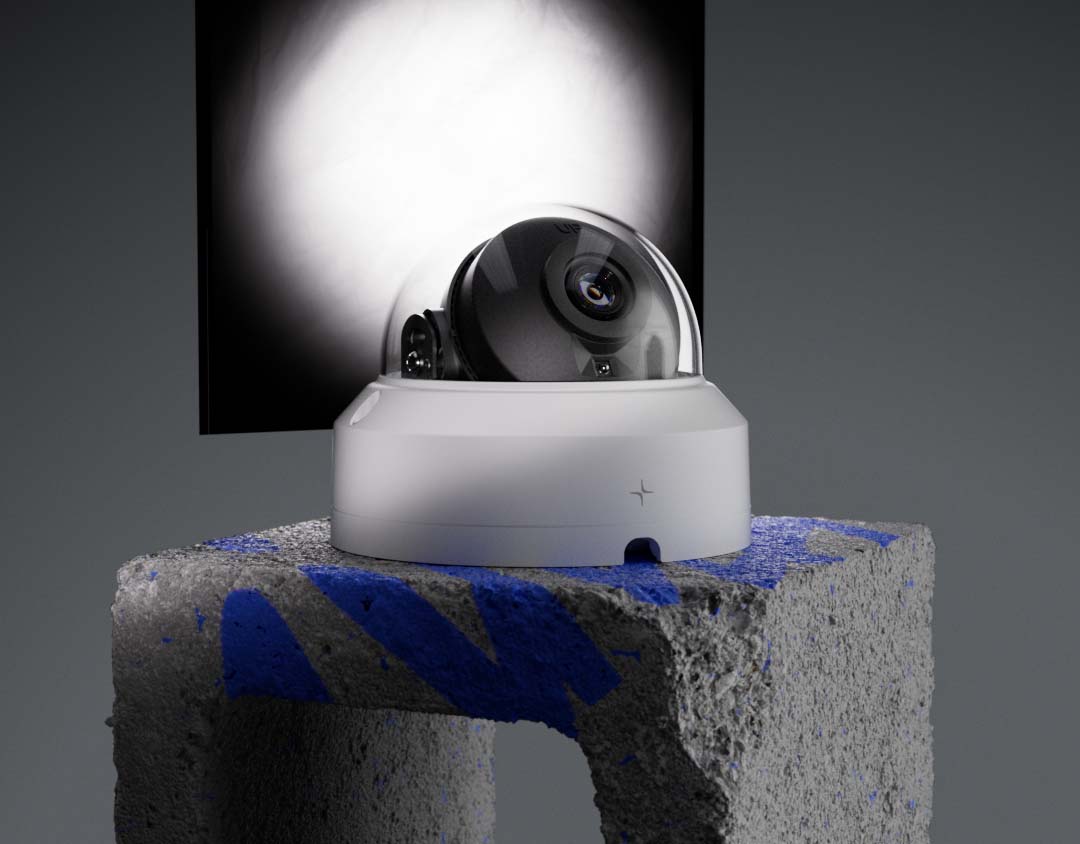
In our example, the render was almost perfect, but lacked sufficient backlight to slightly enhance the back of the product. The solution was to add a light source for backlighting, yet the challenge was to maintain this effect on the black plastic part while eliminating it from the glass.
Step 1: Light Tag Adjustments
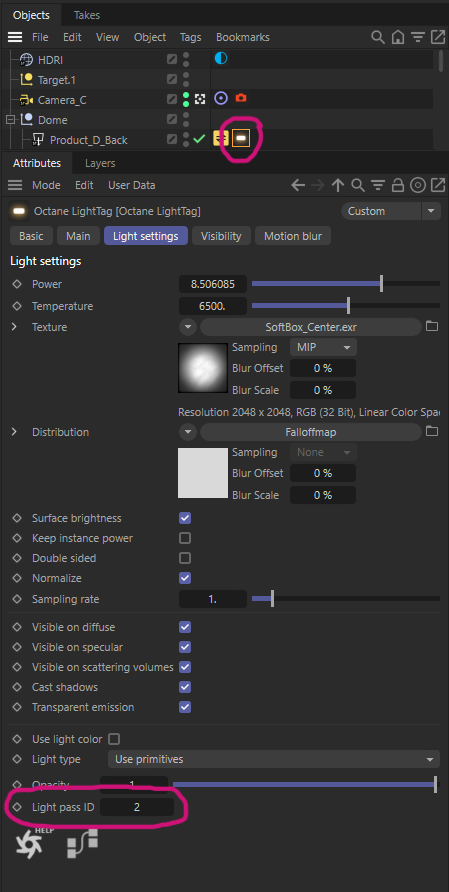
Begin by accessing the Octane Light Tag on the Light Source and open the Light Settings. Scroll to the Light Pass ID and enter a new, previously unused number. For first-timers using Light Pass ID, entering '2' is an effective start.
Step 2: Visibility Tab Changes
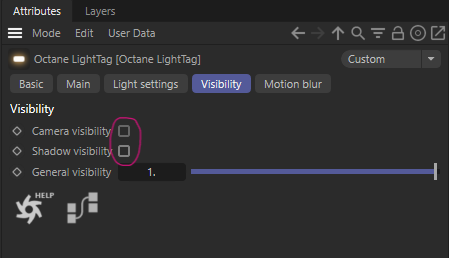
Continue to the Visibility tab within the same Light Tag. Here, uncheck the Camera and Shadow visibility options.
Progress Assessment:
At this juncture, the light source should be invisible in the scene, but you may still notice the reflection in the glass.
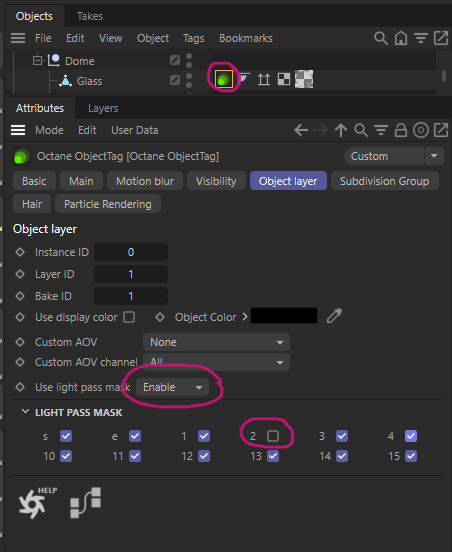
Step 3: Applying Octane Object Tag
To address the lingering reflection, attach an Octane Object Tag to your glass object. In the Object Layer section, enable the light pass mark and uncheck the Light ID number you previously entered.
Addressing New Issues:
After removing the reflection, a prominent dark spot might appear where the light source was located. This can be easily fixed.

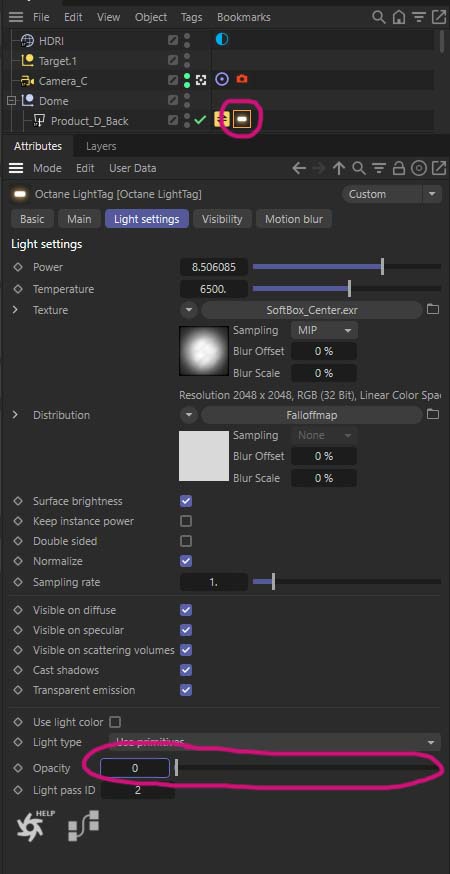
Final Touch:
Revisit the light tag and in the Light settings, adjust the Opacity to 0. This will remove any remaining dark spots.
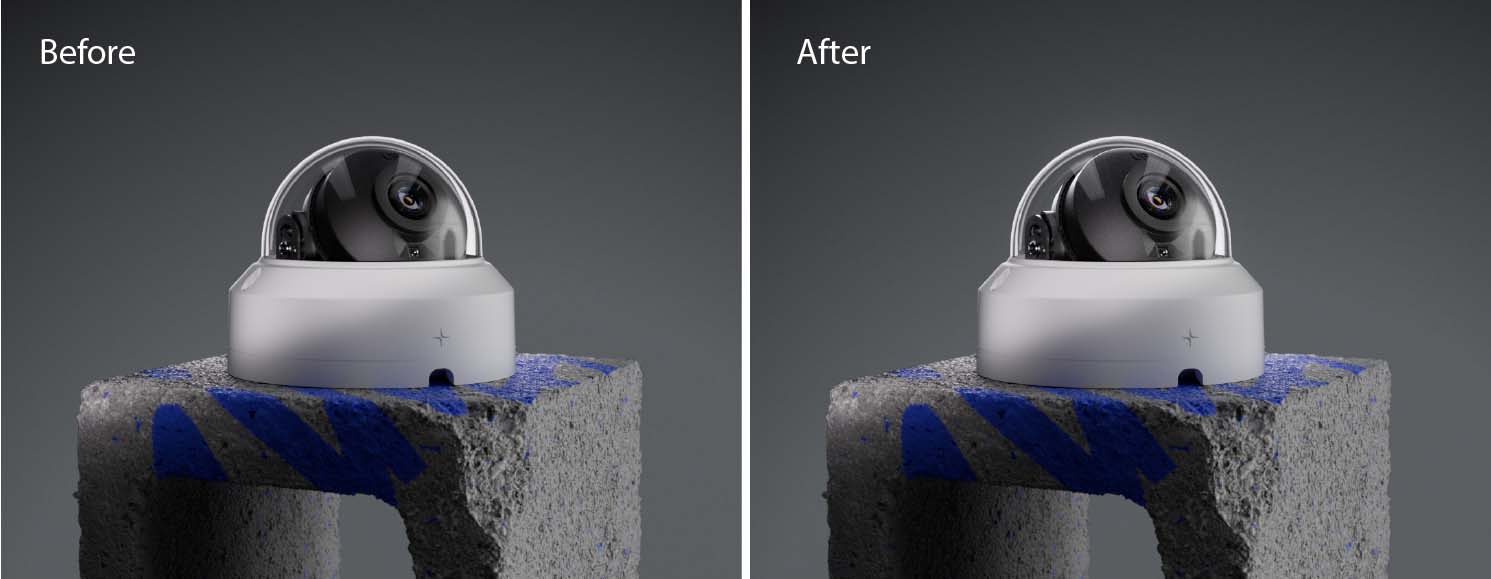
The Final Result:
The final render will exhibit a subtle yet significant improvement, enhancing the overall visual quality.
Expanding Your Octane Toolkit:
For those interested in further refining their Octane rendering skills, our recent blog post, "How to Stop an Object from Reflecting on Another in Octane for C4D", offers additional insights. This article dives into techniques for controlling reflections between objects, a key aspect for achieving more realistic and aesthetically pleasing renders in Cinema 4D using Octane. It's a must-read for anyone looking to master the finer points of reflection manipulation in 3D rendering.